Introduction
The objective of this document is to share how we did proceed to create FirST Love from a coder’s point of view.
This document is not a technical document. It doesn’t unveil any of the tricks/optimizations we’ve developed to make this effect or this other one. We just don’t want to fall into non ending technical discussions. There are forums for that. Still, we provide some advice on how to operate which in our opinion is a lot more useful. Don’t worry! As your experience will grow, you’ll get better and better. I’m using this opportunity to salute Tom/Effect who’s incredibly good after just 1,5 years of coding (congrats for your Flexiscrolls screen at Sommarhack). This is very promising.
You’ve got to put in place a lot of things to build a successful demo. That’s what we’re going to address in this document. And it starts by setting up the right environment.
Setting up the environment
Making high quality productions requires time. Period. And time is the resource we all lack the most these days because, you know, we’ve got professional and personal/family stuffs to deal with.
Setting a peaceful environment was key and for us, that meant:
- Define clear and precise objectives
- Take our time
- Build a trustworthy team
But before all, it was very key to inform our respective families of what consequences this project may have. For example, we could not chill (my wife and I) in front of a good TV series together in the evening because I had to code. Making her understand what the demoscene is, why we like it was very key as well. I faced the famous questions: “What’s the point in just making a demo? What is it useful for?”. In that aspect, the visits at Mr Bee’s place did help a lot, as she could meet with other demosceners and witness the passion (thanks Pat’).
Regarding my kids, they were very supportive from the start. My younger daughter (5 yo) used to dance on every single Jess’s tunes all along. And my older son (14 yo) is playing a lot of games and is keen to understand how that works. I guess that seeing his father creating such stuffs was kind of a good experience for him.
Define clear and precise objectives
So, we made the decision to produce a demo. We had ready to use effects, but we had no idea on how to articulate them.
We’re grown-up adults and, just like us, the scene has evolved and has become more mature over time. Design over everything was our prime decision. Design means a lot:
- Emotions & mood: transmitting a feeling to the crowd
- Messages: what you want to share in a more pragmatic way
- Aesthetics: the visuals that will remain in your audience retinas
When we asked Mic to take on that important role, his very first questions were:
What do you want to tell? When? How long do you think it will take?
Mic / Dune
For FirST Love, the answers were easy: we wanted to celebrate the 35th birthday of the Atari ST and unify the old generation of demo makers and the young generation via an ambitious trackmo. Of course, we also wanted to demonstrate that, even ancient, OVR remains up to date from a technical and design perspective. We wanted to tell it at a major Atari party that is Silly Venture. Considering the amount of time that has passed since our last release and the number of effects we had on the shelf, we believed it would require quite some time to deliver the messages.
Take our time
As mentioned just below, we were fortunate to have already created quite a lot of effects (eg. Gouraud, texture mapping, flexiscrolls, syncscroll, blur, …) when we made our decision to go forward with FirST Love. With Janek, we’ve restarted coding in ASM 68k in the 2nd half of 2016. It was fun. We were discussing technics that we wanted to test. It was just for our personal interest as there were absolutely no plan to release anything. Therefore, the development was very sporadic and slow during the first years. But it had a lot of benefits:
- We used to think quite a lot when it was coming to implement a technic, thus the code we produced was chewed and fairly optimized,
- It preserved our personal and professional lives.
We decided to keep this mindset with FirST Love from the beginning with two huge differences though:
- There will be a timeline.
- There will be a team committed to it.
That said, it is very important to stress out that coding the various effects can be very quick. What is really time consuming is how you will link the whole thing together, how you will create the flow of your demo and how this will impact the technical side of it.
Our personal experience is that it’s better to already have existing effects ready before engaging into creating a brand new demo because there’s a lot more to do. When you’ve got a few effects and that you’ve found a theme for your production, then you can start thinking of creating the production for real and then comes the part where you’ll have to build the team.
Build a trustworthy and fun team
So, we had an ambitious project which meant we needed to onboard the talents that were capable to meet the objectives. With Mic, Jess, Janek, Mr Bee and I, we had all the skills required.
But individual talents do not make a successful team. To be successful you need to:
- Build trust,
- Put in place the governance even minimalistic
Building trust takes a bit of time. We knew what everyone was capable of individually. Still Mic could wonder if the coders would agree to apply the storyboard he had in mind; Jess could wonder if the code would be stable enough for him to properly sync with the effects and not waste his precious time; Janek and I could wonder if the graphics will follow our guidelines.
This is where the beginning of our collaboration was critical in the success of the project. The first part we developed was the ‘Credits’ part. It was not existing at all (except the syncscroll) and required a lot of communications between the coders and the graphic artist. The development of this part was key because it highlighted a few things:
- Everyone was keen to listen to everyone’s opinion and finally agree on a consensus very fast which turned into taking decisions very quick and act upon them,
- Everyone was ready to test ideas even though it would require some big amount of wasted graphics, wasted code lines, or wasted music patterns.
For instance, the idea to add particles was raised late in the development of this part. The code was conceived so that we could have had a lot more colors for the ‘wires’. Then Mic did suggest this idea because it would add some deepness. He even made a mockup to showcase what he had in mind. The idea was so brilliant that we’ve recoded the wire drawing part and added the particles effect. Then, Jess added the music/sound fx on top of it and …… yeah we all were just astonished by the final result. It turned out to be a brilliant idea that was reused in several parts of the demo and contribute to link the whole thing together.
Governance is necessary in such a project. With the proper governance you can:
- Ensure everyone is aligned on the same objective,
- Anticipate potential problems and solve them. For example, at a certain point Jess informed us of some unavailability periods. This allowed us to change our dev schedule with Mic in order to adapt for Jess’s constraints.
Governance was not strict. There were no regular appointments of any kind but we were sharing an online document that was sufficiently detailed for everyone to have a proper progress status.
With the team being spread in France (Janek and I), Sweden (Mic) and West US coast (Jess), there were no other way than to adapt the communications as well:
- I took the lead on that. The code mixing the effects, the graphics and the tunes it was pretty natural to have either me or Janek taking that role
- Communications with Jess (and Ben) all occurred via email (due to the time zones difference for Jess) while all communications with Mic all occurred via Facebook Messenger and by phone
- Roles were clearly defined so everyone knew what he had to do in his domain of expertise.
I’ve got to mention here that Janek and I were very impressed by the capacity of everyone involved to be able to work as a real team. All feedbacks were captured, carefully analyzed and decisions were quickly made. The whole work went very smooth. This was fun from start to finish.
These first 2 months of work on the ‘Credits’ part did set the standards by which we wanted to develop FirST Love. Starting from there we knew how to work together, what to expect from each other and what we could achieve as a team. More important, we knew we would work in a very good climate with fun and great laughs. I know I’ll miss those great moments a lot now that the demo is released. That will surely be the main reason by which we’ll come up with a new demo later.
FirST Love project
HW specifications
FirST Love requires an STf, with a floppy drive (or fdd emulator), and 4 MB of RAM. So why did we decide to go for that setup?
STf vs STe
OVR is a crew that was created in 1988 by Sky Metal (later known as Stan Mercury), at a time where the STe was not existing. FirST Love is about creating a journey that starts in the old days of its creation thus with the STf.
It’s also a time during which crews were discovering very technical tricks (eg. soundtracker, fullscreen, syncscroll). OVR belong to these innovators with Ziggy Stardust inventing the first fullscreen running exclusively with ITs. So FirST Love had to use some markers of the time, respectively the syncscroll, the reset demo and the hidden screen.
Floppy disk
The same goes with the fdd requirement. All demos were transiting in floppies back in the days. Only a very few of us owned HDD. It was natural for FirST Love to be hosted in such a media.
4 MB of RAM
Our main objective was to create a demo that starts fast and constantly flows to the end without any interruption of any kind (eg. Please wait/Loading/Depacking screens). The easiest way to achieve that is by constantly have 2 parts in memory: the current one running and the next part to come.
FirST Love has been split in 8 parts, each of them requiring less than 2 MB, but most of them do require more than 1 MB without memory optimization. When we’ve read that the standards config for Silly Venture was 4 MB, we thought that there was no use to optimize the memory usage. It simplified everything in our mind of course. Yeah, we also have a life out of demo coding so, making this decision, was plain easy.
Now, we’ve read in a forum that some peeps (coders and non coders) were thinking that we needed 4 MB because we were precalculating a lot of things, thus explaining why our 3D Gouraud shading and texture mapping were that fast. Also, I recently got contacted by Heaven^Desire who asked it straight:
Hey RATI, we recently had a chat with sceners about the 3D routines of your latest demo… what was actually real-time and what was precalced?
Heaven^Desire
Our answer is simple:
Our 3D routines do not make use of precalc. In particular, rotation matrix, vertices/normals rotations, vertices projections, faces culling, faces ordering, edge scanning, clipping, chunk buffer filling, affine delta (texture and Gouraud), dithering, screen rasterization are all computed and performed in real-time.
RATI & Janek / Overlanders
We hope it clarifies it all for every sceners who had doubts. We’re not using those 4 MB of RAM to fake 3D rendering stuffs. We observe that FirST Love did create some questioning for many very skilled coders in many demoscenes (Atari 8 bits, C64 and Amiga at the least) outside the Atari ST one. We believe that it shows how impactful the demo is. We also consider that such questioning proves that our routines are really fast so we take it as a compliment 🙂
Speculating on how an effect is done/coded is natural. This request from Heaven allows us to respond to the demoscene communities. So thanks again Heaven^Desire for reaching out to me directly.
Splitting FirST Love
FirST Love is a very big demo project. When you face such a situation, the easiest way is to split the project into smaller sub projects that can live separately.
Splitting starts with the storyboard. The point here is not to discuss how the storyboard was conceived (Mic will elaborate in his part of this making-of), but to explain how we did the split and why it is made this way.
As mentioned before, one of the core principle of FirST Love was to start fast and flow all the way to the end. So, the conceptual approach was to have 2 parts of the demo at the same time ready to play in RAM: the current one executing and the next one ready to be run.
From a technical point of view, it has consequences. On the Atari ST, there is almost always some inits to perform before to run the effects: eg. transforming data, generating code, … the usual stuffs. In the old days, a scrolltext or a very nice picture were displayed to hide that initialization phase. This was the best approach as all effects were in a single screen. A multi part offers a lot more possibilities. We’ve done the split following the rules depicted below:
- Ideally, the part must address a consistent message for the audience (eg. members, credits & title, greetings)
- It must be long enough for Jess to compose a music which will make the part consistent
- The part must contain phases which would run fully in VBL so that we can use the free time (in main loop) for other stuffs that will allow the demo to flow (eg. inits)
- The part had to consume less than 2 MB of RAM as we’ve targeted 4 MB of RAM for the demo.
The following diagrams depicts which phases are running the effects in VBL for each part of FirST Love and what’s happening in the main loop:
Part #1: intro

Part #2: Credits & Title

Part #3: Flexiscrolls & Gouraud & Wire 3D

Part #4: Members

Part #5: Tunnels

Part #6: Pong & Texture 3D

Part #7: Greetings & ‘We are OVR’

Part #8: End

Design over everything
With FirST Love, we did not want to make a technical demo. We wanted to create a well-designed demo: one that generates emotions, one that delivers a message, one that meets SV 2020+1’s context (Atari 35thAnniversary and SV 20th anniversary), one that is nice to hear and fun to watch.
For us (Janek and I), we had to totally change our mindset. Back in the days, the objective for all demo crews was to use every single available CPU cycle in the VBL because you know …… 50 Hz was the only way. Thankfully, the new generation (you know who you are) has brought a lot of fresh air in the scene. By breaking this rule, it allowed to create awesome new effects and make the Atari ST demoscene enter a new era of its history. To all of them, we say THANK YOU ;-). We owe you.
Delivering an aesthetic demo does not necessarily mean that our routines are slow. They are fast exactly where/when it matters and not optimized where/when speed does not matter. Also, why the hell would we use all the available CPU if we don’t need it? Our strategy, from the start, has always been that the code had to serve the design and not the opposite.
As an example, it seems that the ‘Credits’ and ‘Greetings’ parts have pleased many of FirST Love’s viewers. What if I was telling you that barely 60% of the VBL is used? We could have put more particles, we could have added enemies in the ‘Greetings’ part and implemented a complete shoot them up game logic (note that it would require a lot more effort and optimization to make a real shmup – We’re scrolling right to left 4 pixels by 4 pixels here. Steve Bak did a pretty good job with ‘Return to Genesis’. RIP Steve). Actually, we discussed that exact topic within the team. The fact is that we could have gone this way but we were not creating a game. This part is a fly above the most famous Atari crews without any harm or war. We just consider them as belonging to our peers, our scene and we salute them all. That’s just it. The only message. So yes, we’ve got plenty of unused cycles ……. and then again, who cares if the objective is reached. The following videos just shows the amount a free CPU for both parts:
Transitions & attention to details
At first, transitions are just a pain in the ass from a coder’s point of view. But finally, it’s not so hard to get used to them and they play a very important role in the success of your prod. So do the job is our only advice. I believe that it frustrates coders because transitions are usually not difficult effects to code. They are composed of many small steps which takes some time to program and are not very challenging. But when you watch the final result, you can just be very proud. It definitely is worth the effort.
Details also matter a lot. These are all the little things, spread here and there, that not everyone will catch at first sight. That’s what causes the viewer to replay the demo. FirST Love is full of such details. Once again, this requires some time that you may want to spend on something else. Still, if you want to make a great demo, our advice is simple: pay attention to details. Listen to your designer, estimate the impact on the performance, the effort, the value it will bring and code it.
From sept 2020 to may 2021, most of our coding time was split as follow: 30% (transitions), 60% (new effects), 10% (kernel and fdd routines). The table below lists the existing/non existing effects when we’ve started coding FirST Love:
| Part | Effect | Existing | Non existing |
| #1 – Intro | Blur | X | |
| CRT1 | X | ||
| #2 – Credits & Title | Syncscroll | X | |
| Tiles management | X | ||
| Wires | X | ||
| Particles | X | ||
| CRT2 | X | ||
| Worm | X | ||
| You never forget your | X | ||
| #3 – Flexiscrolls + Gouraud 3D + Wire 3D | Horizontal bouncing borders | X | |
| Flexiscroll 1 | X | ||
| Bouncing OVR | X | ||
| Image progressive display – Entry | X | ||
| Gouraud 3D | X | ||
| Image progressive display – Mid | X | ||
| Wire 3D | X | ||
| Dots 3D | X | ||
| Image progressively being erased | X | ||
| Flexiscroll 2 | X | ||
| #4 – Members | Everything | X | |
| #5 – 3D dots scroll + Tunnel | 3D scrolls | X | |
| Tunnel | X | ||
| HUD | X | ||
| #6 – Pong + Zoom + Texture | 1985 + Vertical dates scroll | X | |
| Line separation drawing + dates vertical scroll | X | ||
| Pong | X | ||
| Circle scroll | X | ||
| Zoom | X | ||
| Texture mapping | X | ||
| #7 – Greetings + Sprites | Syncscroll | X | |
| Greets drawing | X | ||
| Particles | X | ||
| ‘FirST Love’ to ‘WE ARE’ | X | ||
| Sprites code generator | X | ||
| #8 – End | Syncscroll | X | |
| Stars | X | ||
| Scrolltext | X | ||
| Reset | 3D stars | X | |
| 3D Flat shading | X | ||
| Hidden screen | Texture mapping | X | |
| OVR1 to OVR2 bounce transition | X | ||
| Glenz gouraud | X | ||
| Small scrolltext | X |
As you can observe, all main effects were already coded (for years for some of them). It took us 8 to 9 months to code the rest. Well, merging FX codes together also took some time. I’m addressing this topic a bit later in this document.
About tools and the development toolchain
Tools
Using tools or developing your own tools are part of the demo creation process. It always had. In the old days, we needed to develop tools for creating maps, transforming graphics, creating sprites curves. The same goes nowadays. First step, of course, is to search the web to find if there’s already an existing tool that fits your needs. For example, we used Tiled for mapping and Blender for 3D modeling. Then, there’s great odds that you’ll have to develop your own tool to transform the exported data.
Testing tools
These are tools we’ve written in java/python that tests some algorithm principles. For example, we’ve tested a lot of dithering technics this way. Here’s a screenshot of the testing program.

We believe that it’s always good to proceed this way when you want to test something quite innovative from an algorithm point of view. Not only will it enable you to test the thing, but it also fasten the identification of optimizations. Of course, the way it is programmed has to be compliant with what the routine could become when translated in assembly.
Data transformation tools
These are tools that inputs data that have been exported from a tool (eg. Blender) and transforms it to the appropriate format for our own assembly routines. We’ve written such tools for Blender, Tiled and GIMP (plug-in).


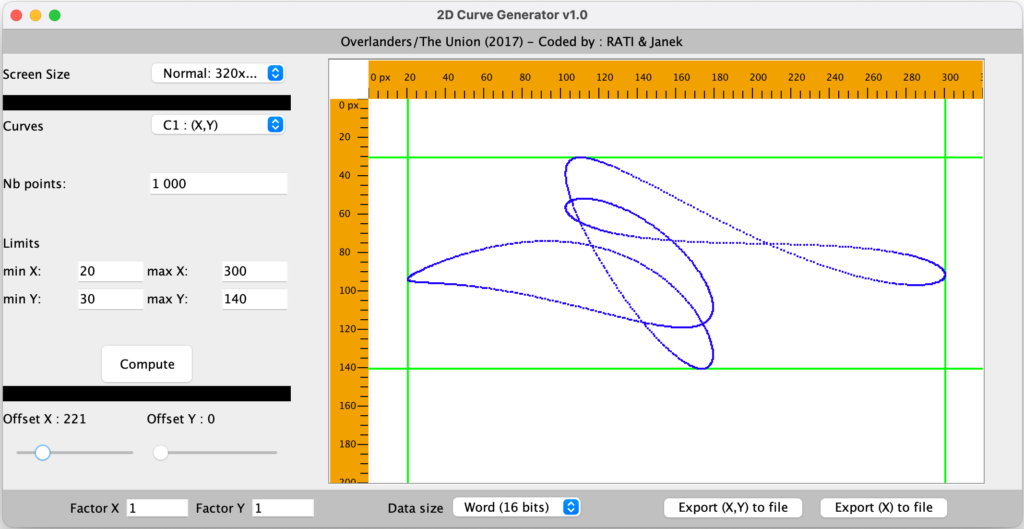
Data creation tools
These are tools that create the data you need for your effect. Screenshots of such tools below: our curve generator and our generator of bounce effect data.

Admin tools
Then you may have to create some small programs that will enable you to make admin stuffs for you like analyzing the PRG file or create the floppy disk. Actually, we did not create the later for FirST Love. The reason is that we had to relearn how the FDD was working on the ST. So, we took a fresh start redeveloping the whole thing (fdd manager, kernel, etc). In the end, FirST Love disks are generated on the ST itself and not an external program. Now that all our routines are validated and stabilized, we may create this tool. We’ve also developed a tool that analyzes the way the memory will be consumed by the program. That was necessary to perform the memory mapping of FirST Love. Here are two screenshots:


Note: symbols are not kept in the final version.
On a side note, some coders prefer to produce some code that is already positioned in memory (ORG directive). That sounds like a good idea. Not only will you save some space on the disk, but you will also gain some preparation time by avoiding relocating the code. Then, you must ensure that your BSS is very carefully initialized. Well, as we had plenty of time and space on disk with FirST Love we did not proceed this way. The code is relocated in memory.
Development toolchain
As written by Janek in the end scrolltext, we’re not pro developers. The consequence is that we could not keep up with all the innovations: eg. Agile methodology leveraging modern source versioning, pipeline management and the like. 90% of the effects in FirST Love have been developed in the old-fashioned way that is: Atom for editing, Hatari + DevPac + MonST for assembling and debugging.
It took only a few minutes to Mr Bee to convince us to use a true Dev toolchain. Starting in mid 2019, all the development was made with VSC + vasm (that Mr Bee had recompiled so that it can handle some specific directives we were using) + GitLab + Hatari.
The only thing we had to do were:
- shift+cmd+B: assemble
- shift+cmd+T: run
Still, we were not using the Dev Toolchain at its maximum. Let me explain. We’ve made the choice to develop with Hatari because it’s fast, reliable, and run on MacOS. One great advantage of using an emulator is that you’ve got a Hard Debugger at your disposal. Of course, Mr Bee talked about it but we were so used to MonST that we ignored it. What a terrible mistake. We’ve started using the hatari debugger during the summer 2020. At first, using a CLI as the debugging tool could seem fastidious but we got used to it pretty fast.
Recently, we’ve installed the HRDB, developed by TAT/Avena, that proposes a GUI for the Hatari debugger. It rocks so hard. It’s powerful, reliable and offers advanced capabilities like the Graphics Inspector that allows to view what you’ve got in RAM. This is a MUST HAVE tool in your toolchain.
So do not make the mistake we did. Forget about MonST and use the built-in debugger alongside the graphic interface built for it.
Make your code ready for an eventual demo
The title of this chapter could sound weird as it has never been in our intention at the beginning to produce a demo. But Janek and I have matured over the years, not only by having grey hairs/beard, but also in the way we used to collaborate together. As said by Janek in his scrolltext, we are experienced in developing personal projects together (eg. a php based website implementing API at a time where it was barely known, or a quite popular game leveraging Valve’s Source engine called Adrenaline Gamer 2). This effective collaboration was applied to all the work we’ve made when restarting coding for the Atari ST.
Find in the next paragraphs the good practices we’ve applied to develop our effects.
Learn
It all starts by having an idea and finding documentation about it. Recently, I’ve found a picture of the time when we visited Fury/Legacy^Replicants at his home in Marseille back in the days. Fabrice is standing up behind Janek (who’s coding on the ST I guess) and shows us a book named: “Computer graphics: Principles and Practice”. We had such a book as well.
That says it all. 30 years ago, lots had been discovered (outside the ST world that is) when it comes to draw shapes without FPU, and much more were left to be discovered. First thing is learning the theory, then it’s your job to develop the effect in the most effective way.
Library based development
All reusable codes shall be part of a library. For instance, we’ve got a pure 3D library that handles everything that is related to 3D manipulations (eg. rotations, projections, translations, scale, face culling, …), another one for each shading type (flat, gouraud, texture mapping), an other one for rendering (eg. C2P), Lines, …
It has a lot of benefits:
- Your main program is simplified at its maximum as there are just a few INCLUDES in it
- Your main program just calls functions that are part of your libraries. It looks like: move/rotate/scale model A, then render the model with Gouraud shading. That’s exactly what FirST Love does.
- You are free to optimize your code anytime without putting the integrity of the main program at risk. It will automatically apply to all your main programs. Main program just manages the flow of the part itself.
Use a consistent prefix for all labels in your libraries: for example we used “R3D_” for everything related to 3D computations, “LINE_” for our line’s routine and so on. As such you:
- Ensure you won’t have any code duplication
- Facilitate the merge of effects together
Note: we’re using the simple prefix ‘_’ for the main program labels. Well, I know that this could seem obvious. But we’re also writing this document for people who, like us, are not pro-programmers.
Document everything
Everything means just that …. everything:
- How did the idea emerge: the development processus can be very sporadic. I guarantee that you’ll have forgotten everything just a few weeks after having worked on an effect. How the idea emerge is critical to capture. Often, that will make you refocus on the base idea when you’ve implemented a part of it.
- Principles: creating optimized code for the ST can be very tricky. By that, what I mean is that your code will not reflect it because, for instance, it will make calls to generated codes/Self Modifying Code and thus will be very difficult to understand later. Detailing the core principles and its respective particularities is a must have.
- Code: it can seem obvious once again but documenting your code with lots of details is just the base. Even those parts that will be self-modified. Our texture mapping renderer has been coded in early 2018. Do you really believe that we can remember every single optimization? Actually, we can. Because it’s all documented.
- Alternatives: when developing a new effect, you’ll reach a point in time where you’ll ask yourself if developing another way could be beneficial or not. Often, this happens when you are advanced in the development of your effect. At first, you may be devastated for not having had this idea earlier. If you’re unsure of the real benefits of the new idea, then we advise you to:
- document the alternative right now so that you won’t forget it. You would be surprised of all the ideas I got under the shower and that were lost from my mind as soon as I went out.
- finish what you’re working on: you may discover a drawback when developing the new idea later on. Plus, what you’re working on may have benefits the alternative method does not have and you’ll gain in expertise on the matter.
- set CONSTANT that will either activate this alternative or this other one in the same code. There should be only one source for a specific effect but there can be multiple implementations. By using compilation constant, you can decide which implementation you will want for your effect. Our libraries (eg. flat shading) are full of such CONSTANTs that dictates which implementation to use.
- Todo: basically, you’re never done with a routine. There’s always some room for improvement. For instance, we’ve coded our sprite’s code generator very late for FirST Love. If you’ve coded such a routine, you know that you can have different strategies (paths) when generating the code. In the end, this is the quality of the generated code that is impacted. We’ve implemented only one strategy at the time. We’ve identified 2 others. They are documented, yet not implemented. That will come … one day. Still, the ideas are there, fully documented.
Variables
Well, it has always been in our genes (Janek and I) so that was easy to keep this best practice. Variables is what allows you to build an entertaining screen just by leveraging one single effect. The effect will just dynamically adapt depending on the variables values.
That said, you need to measure the performance impact for your routines. The more variables you have, the more variations of the effect you can make, but also the more CPU intensive your effect will be. The most optimized code does not allow for any variations. So, it’s a matter of balance between the smoothness of the effect on screen and what message you want to convey to the audience with it.
As you can imagine, FirST Love is making an intensive use of variables.
We spoke earlier of the Scripting Engine. The scripting engine is generic in FirST Love. It’s objective is very simple: just alter those variables when asked for it. It’s just a few lines of code.
Develop optimized code
Design cannot solve everything. At a certain point the performance of your routines will matter for your demo to look nice and smooth. As a coder, you’ll have to think how you can produce code that runs fast … very fast … extremely fast 😉
We can’t teach how to code very optimized code. What we can tell you though, is that you must ‘think’ before ‘acting’. We all face this period during which we want to watch the effect we have in mind running on the screen very fast. But believe us, if you’re not taking your time, your code risks to be crappy, hard to maintain, difficult to improve. You’ll just have wasted your time. Moreover, because you’ve written crappy code, you’ll feel like the effect is harder to code than it actually is. In the end, this is devastating. Your code must be of quality because optimization is nothing else than an iterative process that will drive you thru the following loop:
- Write code
- Learn from it
- Increase your expertise
- Identify optimizations. Go to step ‘1’
So thinking about what? Think about:
- Algorithm: remember that it does not have to be short to be fast. In most situations, it has to use repeated patterns and use low CPU intensive instructions (make use of these documents: cycle table: https://wiki.neogeodev.org/index.php?title=68k_instructions_timings + how the 68k cache works here: http://pasti.fxatari.com/68kdocs/68kPrefetch.html )
- Alternatives: there are always multiple ways of accomplishing an effect. Select those which have potential. As your experience will grow, you’ll be able to limit the number of alternatives drastically to only select the ones that are really promising. Remember what you’ve read here and there (threads in a forum, technical documentations) and ask yourself if this is the only way to go. Be creative. You need to become an expert of the effect you’re working on: computation, rendering, … Everything matters.
- What you discussed already with your peers (in my case, with Janek): few brains are superior to one single brain. No doubt.
Many great optimizers also became really good because they did study the code made by others. This is not what we do because:
- We like doing things on our own,
- In our opinion, it can curb your creativity.
But let’s reckon that it can speed up the creation of an effect. This can also benefit experienced coders who are capable of understanding how the routine works and improve their own routines.
Outroduction
Well, having reached the end of this document, we realize that we had much more to share than we had imagined at the beginning.
We hope you enjoyed reading this making-of. More important, we hope it will help some of you develop the next ‘milestone’ demo for the Atari ST demoscene. About that, all what is described in this document could apply to any demoscene.
We can understand that some of you may be disappointed because there’s no advanced technics unveiled. This is not the intent of this document. Still, we shared with you how we proceeded. It should normally give some good results, and you should grow as a top coder.
You are free to comment.
Cheers,
RATI & Janek from Overlanders / The Union – 21/10/2021
Adso
Real Virtuality / Kas - Undead
Damo
Alien / ST-CNX
RATI/OVR